
Haircuts for Thin Hair: Shape, Texture, and Upkeep

Choose the visible outline for lower-density hair. Compare a compact bob, shorter textured crop, and restrained longer perimeter by the dry edge, front framing, and upkeep you can realistically maintain. A haircut can change the shape you see, but it does not increase hair density.

Read the Cut Outline Before Choosing a Look
Start with the dry outline, not a promise of more hair. On a lower-density bob, an honest visible part and a complete lower edge let you see where the hair gathers and where it separates. Trace the perimeter, the outer edge of the cut, then find the shortest layer and the place where the shape looks widest. Those details make a reference useful even when your density differs from the model’s.
Density describes the concentration of strands; strand diameter describes the size of one strand. Sam Villa’s professional explanation of fine and thin hair makes that distinction explicit. A person can have lower density without having fine strands. A haircut can rearrange the visible outline, but it cannot treat hair loss or change the number of strands.
Layers distribute length and visual weight. In Sam Villa’s guide to layering patterns, section direction affects both weight distribution and how visible a cutting line appears; horizontal sections can build weight into a shape. Use that as language for discussing your desired edge, not as a universal instruction for how your stylist should cut your hair. A compact bob and a shorter textured crop place the visible weight in different parts of the silhouette.
Compare Compact Bob, Shorter Textured Crop, and Restrained Longer Perimeter
Compare the options at a similar camera angle and in their ordinary dry state. Look for the perimeter, front section, and crown shape before judging the polished finish.
| Shape | Dry outline | Front and volume | Ask your stylist |
|---|---|---|---|
| Compact bob | Clear chin or jaw edge with restrained layers | Front follows the compact lower line; weight reads near the perimeter | Where will this edge fall when my hair is dry? |
| Shorter textured crop | Shorter nape and sides with separated ends | Longer front and crown define the shape | How will the front, ears, and nape look as it grows? |
| Restrained longer perimeter | Modest longer line with a natural part and believable spacing at the ends | Volume stays gentle rather than built into a false full edge | How much length can I keep without losing the outline I want? |
If your choice is between a compact bob and a shorter textured crop, hold the starting density and dry texture constant in your comparison. In the bob, the lower edge near the jaw is the main line. In the crop, the shorter ear and nape outline and longer front make the difference. Neither is a ranking of the person wearing it.
Compact Bob
The compact bob below ends near the jaw. Its lower edge is easy to read, and the layers do not remove the shape of that edge. If your hair naturally separates at the part or near the ends, show that to your stylist and ask how the line would sit on your own dry hair. Compare a wider range of bob shapes only if the bob family is your preferred direction.

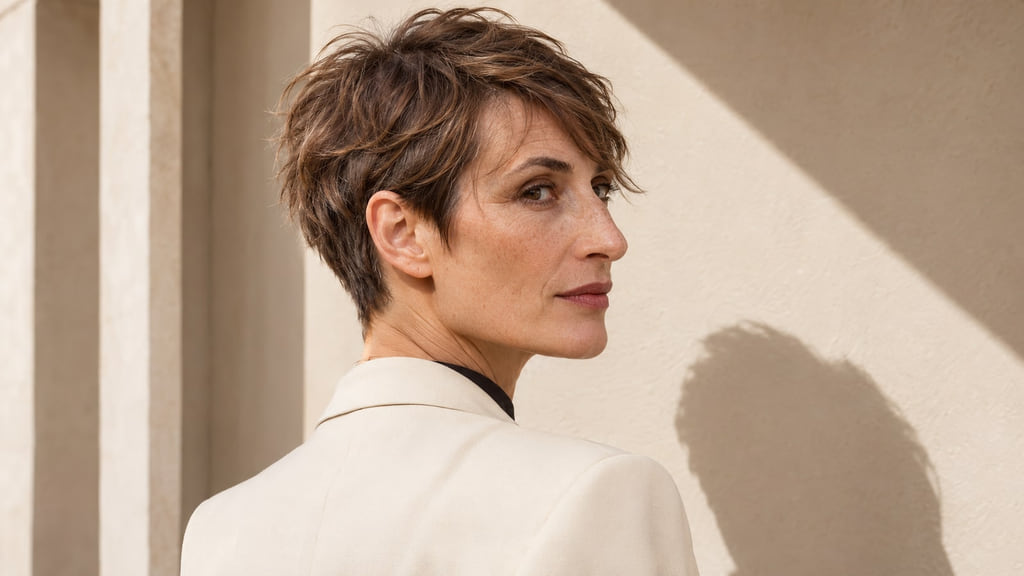
Shorter Textured Crop
The crop keeps the nape and sides short relative to the crown. Separated strand groups make the shorter endpoint visible around the ear, while the front stays long enough to shape. Ask which part of the front you would reset each day and how the ear and nape boundaries would change between appointments.
Restrained Longer Perimeter
This longer option leaves a modest outline rather than pretending that the ends are uniformly dense. The natural part and separated lower strands remain visible. If you want to keep length, compare the point where the ends still form a line with the point where they begin to separate in your own dry hair. That is a more useful landmark than a universal rule about how long thin hair should be.

Account for Texture, Density, and Growth Direction
Check a reference against your hair after it dries in the way you normally wear it. Straight hair may show small gaps at the lower edge; waves or curls may collect into groups and finish at a different dry point. Growth direction can split a fringe or shift a part. Density affects the amount of hair available at the perimeter, while strand diameter affects how an individual strand behaves. If fine strands are your main question, use the separate fine-hair guide.
For a compact bob, point to the dry jaw landmark, show where your part naturally falls, and ask how much layering would leave the edge you want. For a shorter textured crop, show how your front section lies now and which side or nape areas you are comfortable exposing. A reference with a different texture can still communicate a silhouette; your stylist should adapt its placement to your starting hair rather than promise an exact copy.
Plan Styling and Grow-Out
Try to picture each cut after your usual wash and a normal morning reset. A compact bob may need attention to the part and lower edge. The cropped shape puts more daily attention on the front, sides, and crown. A longer outline may be easier to leave alone, but its ends can separate in a way you may or may not like. Choose the work you are willing to repeat.
| Shape | Daily check | Grow-out sign | Salon conversation |
|---|---|---|---|
| Compact bob | Does the part and lower line settle with your usual drying method? | The edge moves below the chosen jaw landmark or loses its clear line | How precise should the perimeter stay? |
| Shorter textured crop | Can you reset the front and crown without a full restyle? | The ear or nape boundary softens and the front falls differently | Which short area will need attention first? |
| Restrained longer perimeter | Are you comfortable with naturally separated ends? | The lower outline becomes less distinct than you want | What is the longest dry edge that still serves my goal? |
There is no fixed trim interval that fits every one of these cuts. If a simple routine matters most, the low-maintenance haircut guide helps you compare wash-day work, daily reset, and the precision you want to maintain.
Build Your Haircut Reference
Save a photo that shows the full crown-to-ends outline, then add a front or side view that shows the part, fringe, and ear. Include a current photo of your own hair dry and normally styled. Match the reference’s texture and density as closely as you can, and point out any difference that might change the result.
I want to compare a compact bob with a shorter textured crop. My reference shows a lower-density bob with an honest visible part and a full cut outline. Keep my natural density visible, and show me the difference in the dry perimeter, front framing, and crown shape before we choose a cut.
Use the reference to settle one dry endpoint, one front section, and one realistic styling routine with your stylist. Bring both outlines to the conversation and ask which details can work with your natural density and growth pattern.
Frequently Asked Questions
How will this shape work with my natural texture?
Notice where your dry hair separates, bends, and gathers at the edge. Compare those points with the reference rather than relying on its haircut name. Face shape may help you describe placement, but texture, density, and growth direction affect what you will actually see.
What changes as the cut grows out?
The compact bob’s lower edge may move past your chosen landmark. On the shorter crop, the ear and nape boundaries may soften while the front changes direction. Decide which change you would notice first and how much salon upkeep you want.
What should I show my stylist?
Bring a full-outline view, a front or side view, and a current dry photo of your own hair. Point to the edge, shortest section, and volume placement you want. Describe lower density separately from fine strand diameter, and keep any hair-loss concern separate from the haircut decision.