
Gray Blending Ideas: A Practical Comparison

Choose the transition between gray strands, previously colored lengths, and natural regrowth. Compare fine highlights, lowlights, a softer root transition, and a grow-out plan. Treat the result as a direction to discuss with a colorist; your starting base and color history affect what is achievable.

Read the Color Direction Before Choosing a Look
Start with a salt-and-pepper reference where silver remains visible and the root-to-length contrast looks softer. Mark what you want to keep: darker intervals, lighter strands, or a distinct natural root. Compare depth, how light or dark the hair looks, separately from tone, its visible color direction. In Wella’s color chart, the number before the stroke identifies depth and the number after it identifies tone. That is Wella’s numbering system, not a universal shade code or a prediction for your hair.
Fine highlights add narrow lighter connections among darker hair. Lowlights add selected deeper strands among lighter or gray hair. Neither is a ranking of which look is better. Blending is a transition strategy, not the same as full gray coverage or reversing graying. Decide how much silver should remain visible before choosing a technique name.
Compare Fine Highlights, Lowlights, Softer Root Transition, and Grow-Out
Compare the visible placement and depth difference first. Then compare tone in photos with similar light and exposure. These are editorial examples for discussing a goal with a colorist, not claims that each service will suit every starting base.
| Direction | Visible change | Keep visible | Ask about your starting base |
|---|---|---|---|
| Fine highlights | Narrow lighter strands among the base strands | Darker intervals rather than a uniformly light surface | Which sections can become lighter while my natural depth remains readable? |
| Lowlights | Deeper strands within a lighter or mostly gray base | Lighter hair between the deeper pieces | How much depth can be added without covering the silver I want to keep? |
| Softer root transition | A less abrupt boundary between natural regrowth and colored lengths | Two distinguishable areas, connected more gently | Where is the strongest boundary on my current hair? |
| Grow-out plan | A mapped natural root, dyed length, and transition zone | The amount of natural gray you choose to reveal | Which existing color can remain as the natural section grows? |
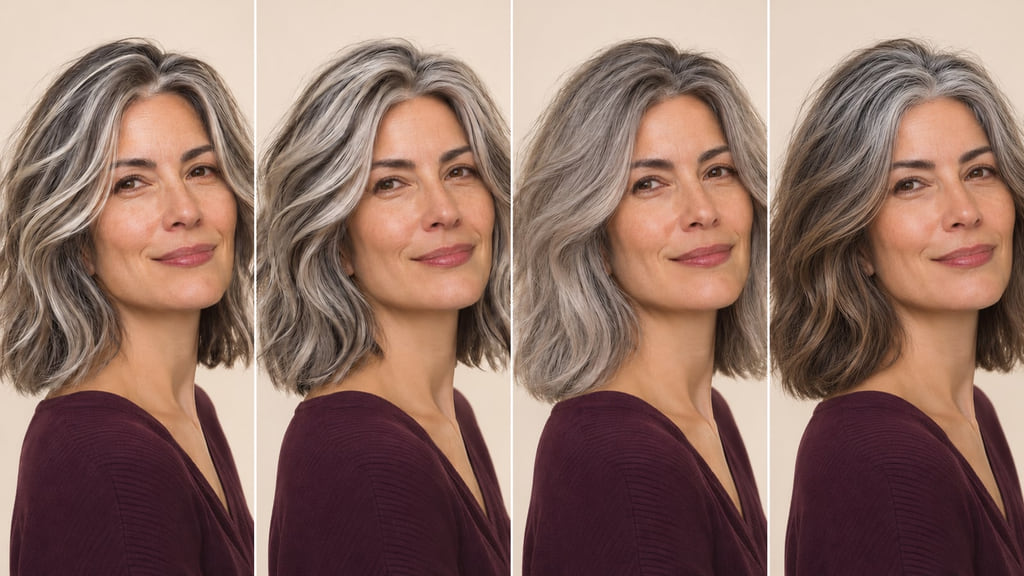
For a first choice, compare A, fine highlights that leave dark intervals, with B, lowlights that leave light intervals. Both keep variation visible, but they change opposite parts of the depth pattern. If the strongest contrast sits between new roots and older color, compare a softer transition or a grow-out plan instead.
Fine Highlights
Narrow lighter strands can connect scattered silver to a darker base while leaving darker hair between them. Compare a reference with your own root pattern in the same light: where do the lighter strands begin, and how much dark depth stays visible? Ask which sections can change and which should remain at your current depth.
Lowlights
Deeper strands can add separation within a lighter or mostly gray base without making all the silver disappear. A narrow piece may still look strong if its depth differs sharply from the surrounding hair. Keep the light, angle, and approximate tone steady when comparing its depth with a highlight reference. Ask how much silver would stay untouched.
Softer Root Transition
This direction reduces the abrupt visual boundary between natural regrowth and colored lengths while keeping both areas distinguishable. Look at the part, hairline, and ends together; a soft root in a cropped image can hide a strong band farther down. Ask where your current boundary starts and how a proposed placement would connect it to the lengths.
Grow-Out Plan
Map the natural roots, previously dyed lengths, and the zone between them. Decide which visible boundary you are comfortable keeping as the natural section gets longer. A grow-out reference should show both roots and ends, not just a finished silver look. Ask what can remain untouched and what might need a staged change.
Account for Your Starting Base
Natural depth, previous color, length, and current condition change the starting point. Fine highlights on untreated medium hair are a different discussion from fine highlights through old dark color on the lengths. Show the roots and ends in one photo and describe earlier services. Wella’s depth and tone language can help name a visual difference, but its numbers do not tell you what your hair can reach.
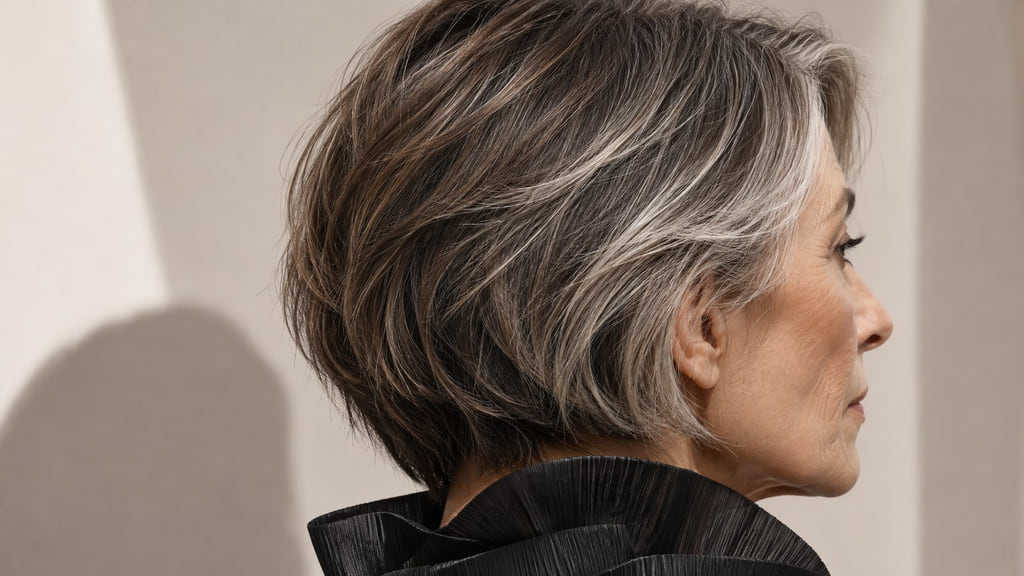
If your base is already mostly silver, lowlights may be the more useful visual comparison; if your lengths hold old dark dye, the colorist may suggest a different sequence from the photo you saved. Keep the goal of connecting gray strands, colored lengths, and natural regrowth, then discuss the feasible service in person. For neighboring decisions, see Hair Colors for Gray Hair, Root Shadow vs. Root Smudge, or Low-Maintenance Hair Colors.
Plan Regrowth and Color Upkeep
Watch the root boundary and the reflection through the lengths separately. Fine highlights may remain distinct as the placement moves away from the scalp, yet their lighter tone can change. Lowlights may lose depth or create a more visible contrast beside returning silver. The first change you notice, not a fixed appointment interval, tells you what to discuss next.
| Direction | Everyday check | Change you may notice | Salon support to discuss |
|---|---|---|---|
| Fine highlights | Can you still see individual lighter strands in your usual part? | Root placement moves; reflection in lighter strands shifts | Whether placement, tone, or both need attention |
| Lowlights | Do the deeper pieces still leave the desired silver visible? | Deposited depth fades or new gray changes contrast | How much depth you want to restore |
| Softer root transition | Does the connection still look gentle when you part your hair normally? | The boundary becomes more visible as roots grow | Whether to maintain or loosen that connection |
| Grow-out plan | Are you comfortable with the visible natural section today? | The natural root occupies more of the length | Which older colored areas, if any, to revisit |
Take a current photo when the change starts to bother you. Compare it with your reference in similar light, then decide whether the issue is depth, tone, placement, or the growing boundary.
Build Your Color Reference
Save a neutral-light photo of your own roots, part, and lengths. Add a reference that shows the transition you want from the same angle, plus a second view of the sides or back if the placement is hidden in the first. Keep the reference’s starting depth and lighting as close to yours as you can.
You can bring this request: “I want to compare fine highlights with lowlights. My reference is salt-and-pepper hair with deliberately softer root-to-length contrast. Keep the natural density and show me the difference in depth, reflection, and placement before we choose a service. Here is my natural root and the color still on my lengths.” This is a visual brief, not a formula.
Choose which transition you prefer between gray strands, colored lengths, and natural regrowth. Mark that area in the reference and discuss it with a colorist. A photo shows the direction you want, but cannot predict the chemical result.
Frequently Asked Questions
How do I compare these shades at a similar depth?
Use photos with similar light, exposure, and white balance. First compare how light or dark the hair looks; then compare its warm, cool, or neutral reflection while keeping depth roughly steady. Wella’s chart separates depth and tone within its own numbering system.
Does my starting color change the achievable result?
Yes. Fine highlights through untreated darker hair and lowlights through mostly silver hair start from different depth patterns. Previous dye on the lengths adds another constraint. Show both roots and ends, then ask which parts of your reference are feasible on your current hair.